Workflow Tutorial
This tutorial builds a product workflow for data objects, covering places, transitions, guards, custom layouts, and additional fields.
Create a class and custom layouts
Start with a simple product class containing sku, localized name, localized picture, localized description, price, and quantity.
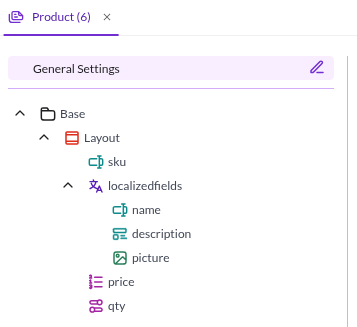

Add four custom layouts to assign to specific workflow statuses:
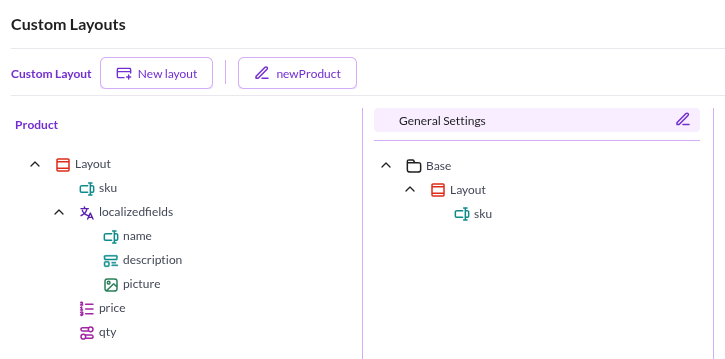
newProductlayout with ID =newProduct

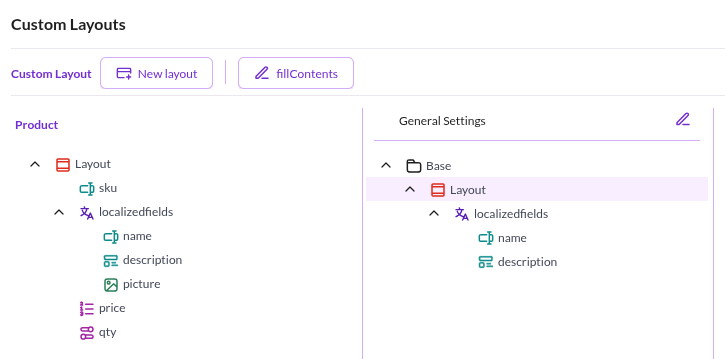
fillContentslayout with ID =fillContents

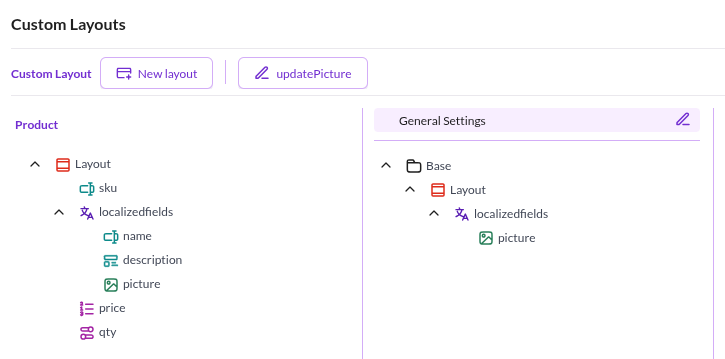
updatePicturelayout with ID =updatePicture

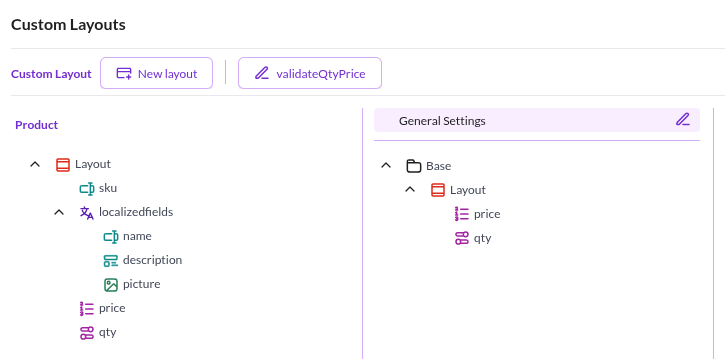
validateQtyPricelayout with ID =validateQtyPrice

The workflow declaration
Create the base configuration in config/config.yaml:
pimcore:
    workflows:
        my_workflow:
            label: 'Product Workflow'
            type: 'state_machine'
            supports:
            - 'Pimcore\Model\DataObject\Product'
            places:
                #TODO
            transitions:
                #TODO
The workflow is called Product Workflow and applies only to instances of
Pimcore\Model\DataObject\Product. The workflow type state_machine restricts the element to one active place at a time.
Places and transitions are defined in the following sections.
Specify places
Define places for products. In this scenario, new products arrive from an external system as empty objects with only a SKU. The workflow needs to support deciding which products to use in Pimcore and which to reject. This requires (at least) three places:
- new - for the newest products
- rejected - for products that will not be used, with a required note explaining the reason
- update content - for products to prepare for publishing
(...)
    places:
        new:
            label: 'New product'
            color: '#377ea9'
            permissions:
                - objectLayout: 'newProduct'
        rejected:
            label: 'Rejected product'
            color: '#28a013'
        update_content:
            label: 'Update Content'
            title: 'Updating content step'
            color: '#d9ef36'
            permissions:
                - objectLayout: 'fillContents'

(...)
The objectLayout key defines which custom layout to use for each place. Here, the new place
uses custom layout 1 and update_content uses custom layout 2.
Specify the first transitions
An administrator can decide which products to process and which to reject. Add two transitions:
- reject product - changes the status for products not to be used
- start processing - moves the product to the processing step
(...)
    transitions:
        reject_product:
            from: new
            to: rejected
            options:
                label: 'Reject the product'
                notes:
                    commentEnabled: true
                    commentRequired: true
        start_processing:
            from: new
            to: update_content
            options:
                label: 'Start processing the product'
(...)
More statuses, actions, and definitions
Add 4 more places for the content update pipeline:
- updating the content
- updating the picture
- updating the price and stock
- marking content as ready - moving the product back to the administrator
Add these to the configuration file:
(...)
    places:
        (...)
        update_picture:
            label: 'Update Product Picture'
            title: 'Update the product picture'
            color: '#d9ef36'
            permissions:
                - objectLayout: 'updatePicture'
        validate_stock_and_price:
            label: 'Validate Stock + Price'
            title: 'Check the quantity and the price'
            color: '#d9ef36'
            permissions:
                - objectLayout: 'validateQtyPrice'
        content_prepared:
            label: 'Content Prepared'
            title: 'Content ready to publish'
            color: '#28a013'
(...)

    transitions:
        (...)
        content_updated:
            from: update_content
            to: update_picture
            options:
                label: 'Content up-to-date'
                notes:
                    commentEnabled: true
                    commentRequired: false
        picture_updated:
            from: update_picture
            to: validate_stock_and_price
            options:
                label: 'Picture up-to-date'
                notes:
                    commentEnabled: true
                    commentRequired: false
        content_ready:
            from: validate_stock_and_price
            to: content_prepared
            options:
                label: 'Content is ready to publish'
(...)
Last actions: publish or rollback
At the final stage, the workflow offers three choices:
- Publish the product (with an additional field called "timeWorked")
- Start the workflow from the beginning
- Reject the product (with a note)
The reject and start processing transitions already exist. Add content_prepared as an additional
from place. This works because the workflow type state_machine supports multiple from places
per transition.
(...)
    transitions:
        reject_product:
            from: [new, content_prepared]
            to: rejected
            options:
                label: 'Reject the product'
                notes:
                    commentEnabled: true
                    commentRequired: true
        start_processing:
            from: [new, content_prepared]
            to: update_content
            options:
                label: 'Start processing the product'
                notes:
                    commentEnabled: true
                    commentRequired: false
(...)
The final addition is a publish transition with a place and a guard restricting it to a certain role:
(...)
    places:
        (...)
        accepted:
            label: 'Accepted product'
            color: '#28a013'
(...)
And the transition with a "timeWorked" additional field:
(...)
    transitions:
        (...)
        publish:
            from: content_prepared
            to: accepted
            guard: "is_fully_authenticated() and is_granted('ROLE_PIMCORE_ADMIN')"
            options:
                label: 'Publish the product'
                notes:
                    commentEnabled: true
                    commentRequired: true
                    additionalFields:
                        - name: 'timeWorked'
                          fieldType: 'input'
                          title: 'Time Spent'
                          required: true
(...)
Workflow in action
The following table shows the workflow at each stage:
| Status | Screenshot |
|---|---|
| Initial status when new object comes into the system | 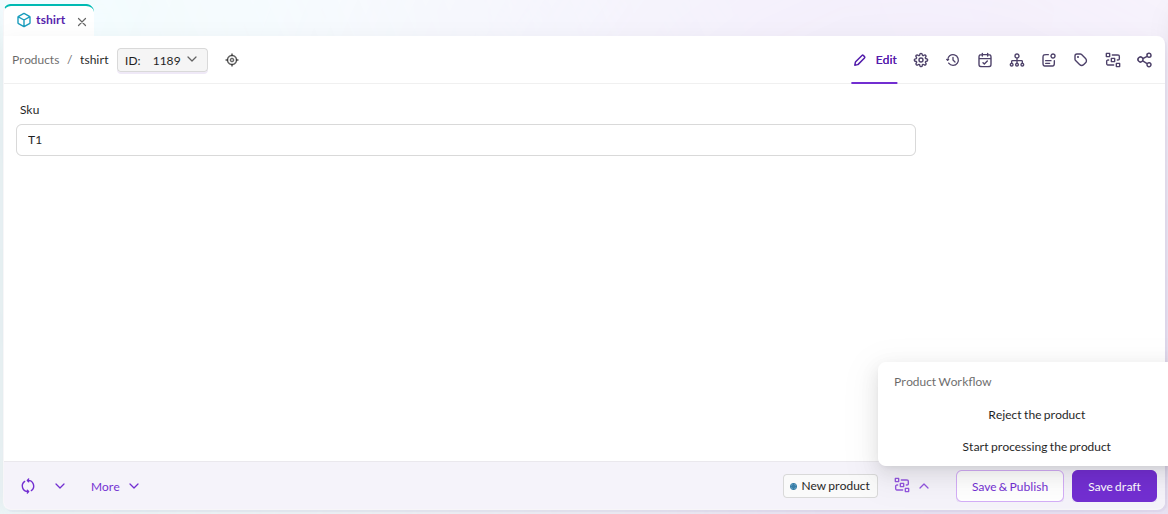  |
| Update Content | 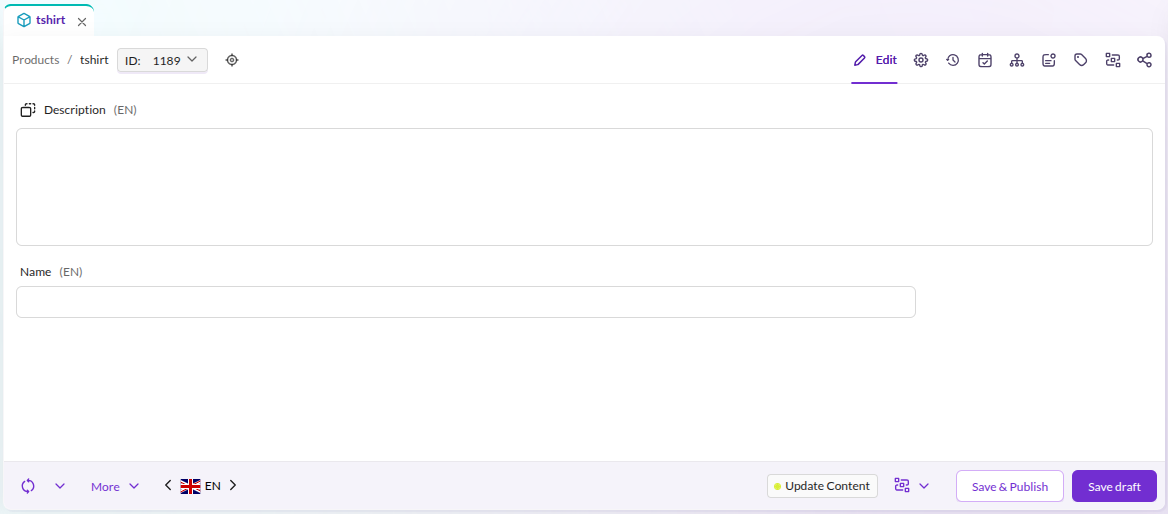  |
| Update Picture | 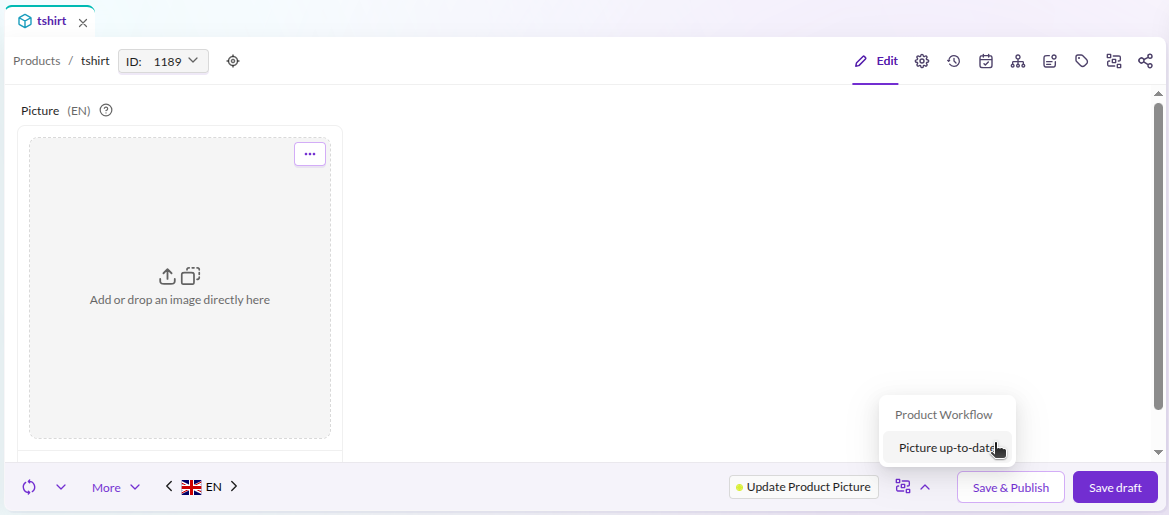  |
| Validate Price and Stock | 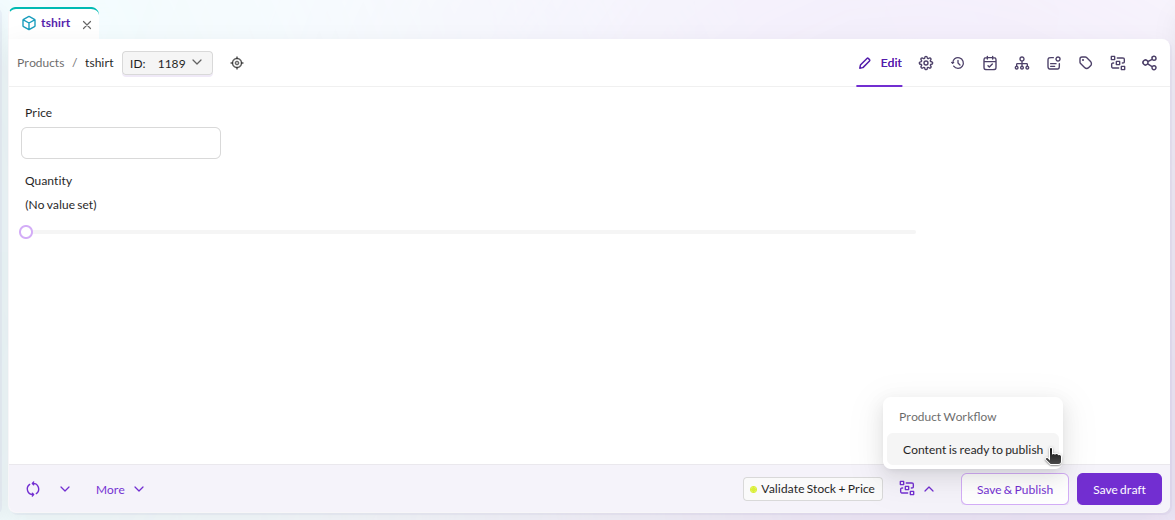  |
| Content is ready | 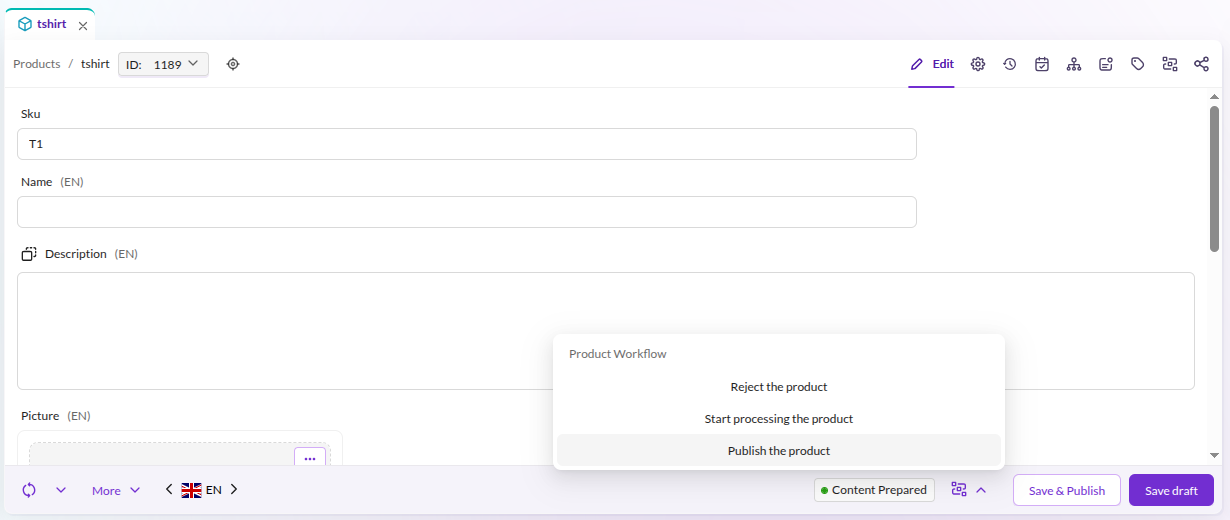  |
| Publish the Product | 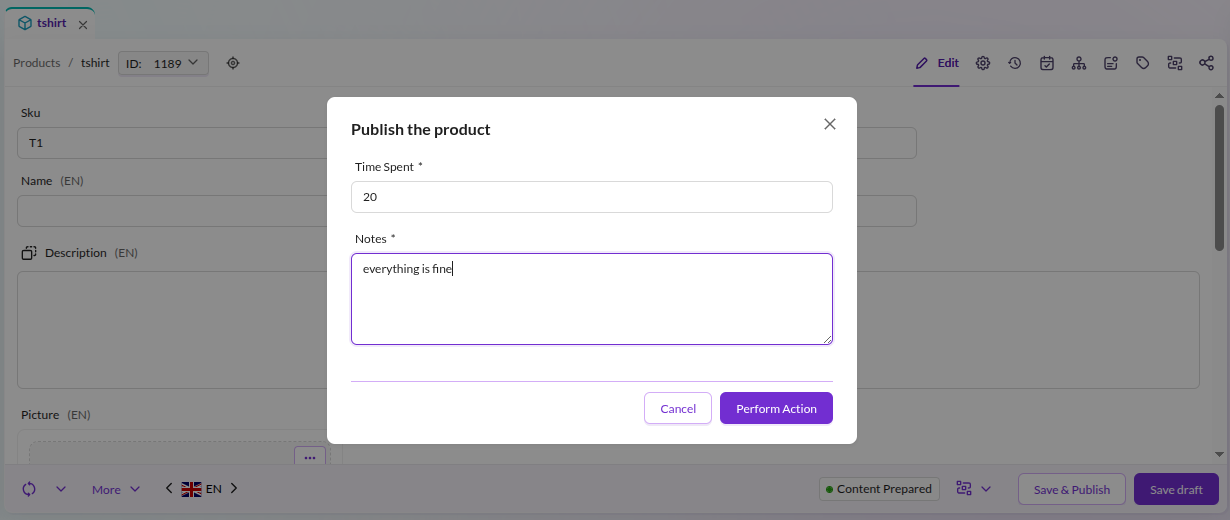  |
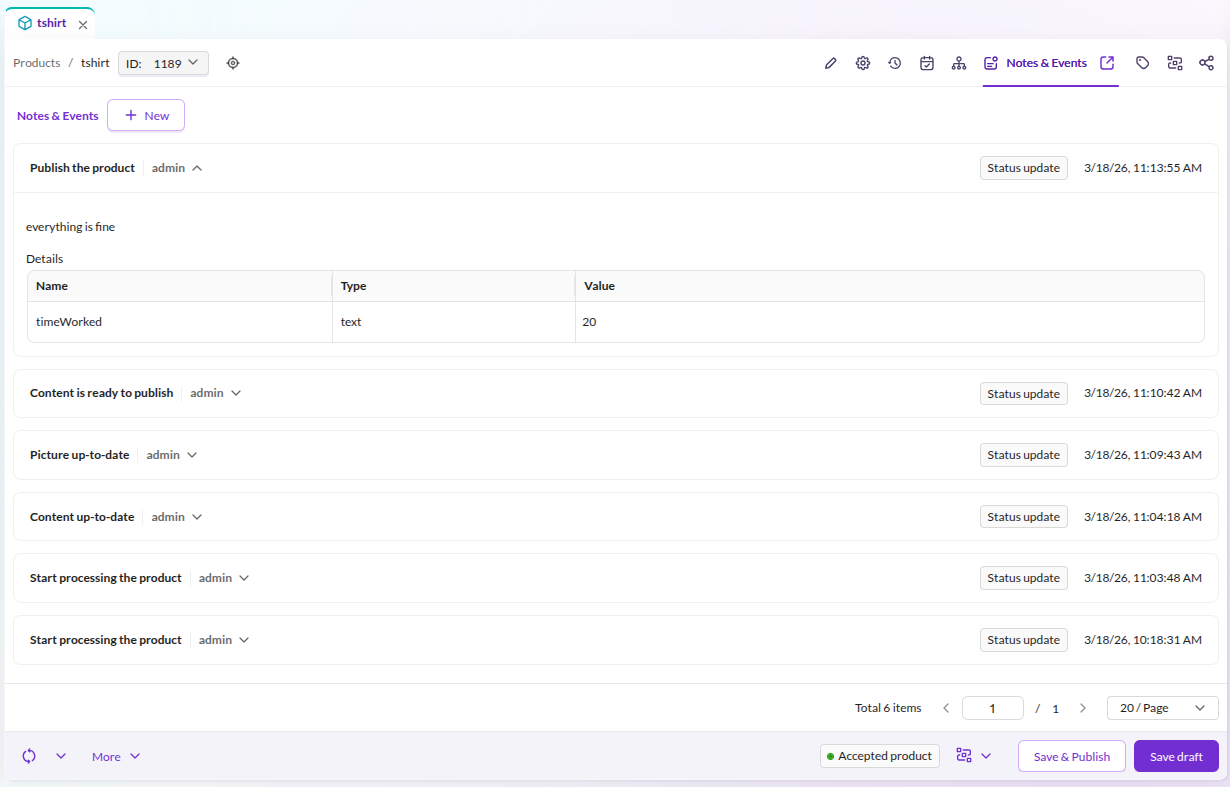
Check the history
The "Notes & Events" tab lists every action applied to the object through the workflow module.