Advanced Image Thumbnail Features
This page covers advanced image thumbnail features. For the basics of creating thumbnail configurations and generating HTML, see Image Thumbnails.
For auto (web-optimized) format support, see Customize Auto Format below.
High-Resolution Support
Pimcore supports embedding high-resolution (ppi/dpi) images. For typical web-based cases,
Pimcore automatically adds the srcset attribute to <img> and <picture> tags,
so no manual work is necessary. The following is only needed in special use-cases like
Web-to-Print.
The high-resolution scaling factor is limited to 5.0 (e.g. @5x). Float values are supported.
To increase the limit, use the max_scaling_factor configuration option:
pimcore:
    assets:
        thumbnails:
            max_scaling_factor: 6.0
You can define the maximum automatic DPI scaling factor used for image thumbnail srcset values
via the pimcore.assets.image.thumbnails.max_srcset_dpi_factor configuration option.
By default, this value is set to 2, and the getSrcset() method generates values
in increments of 1.
Use in the Thumbnail Configuration
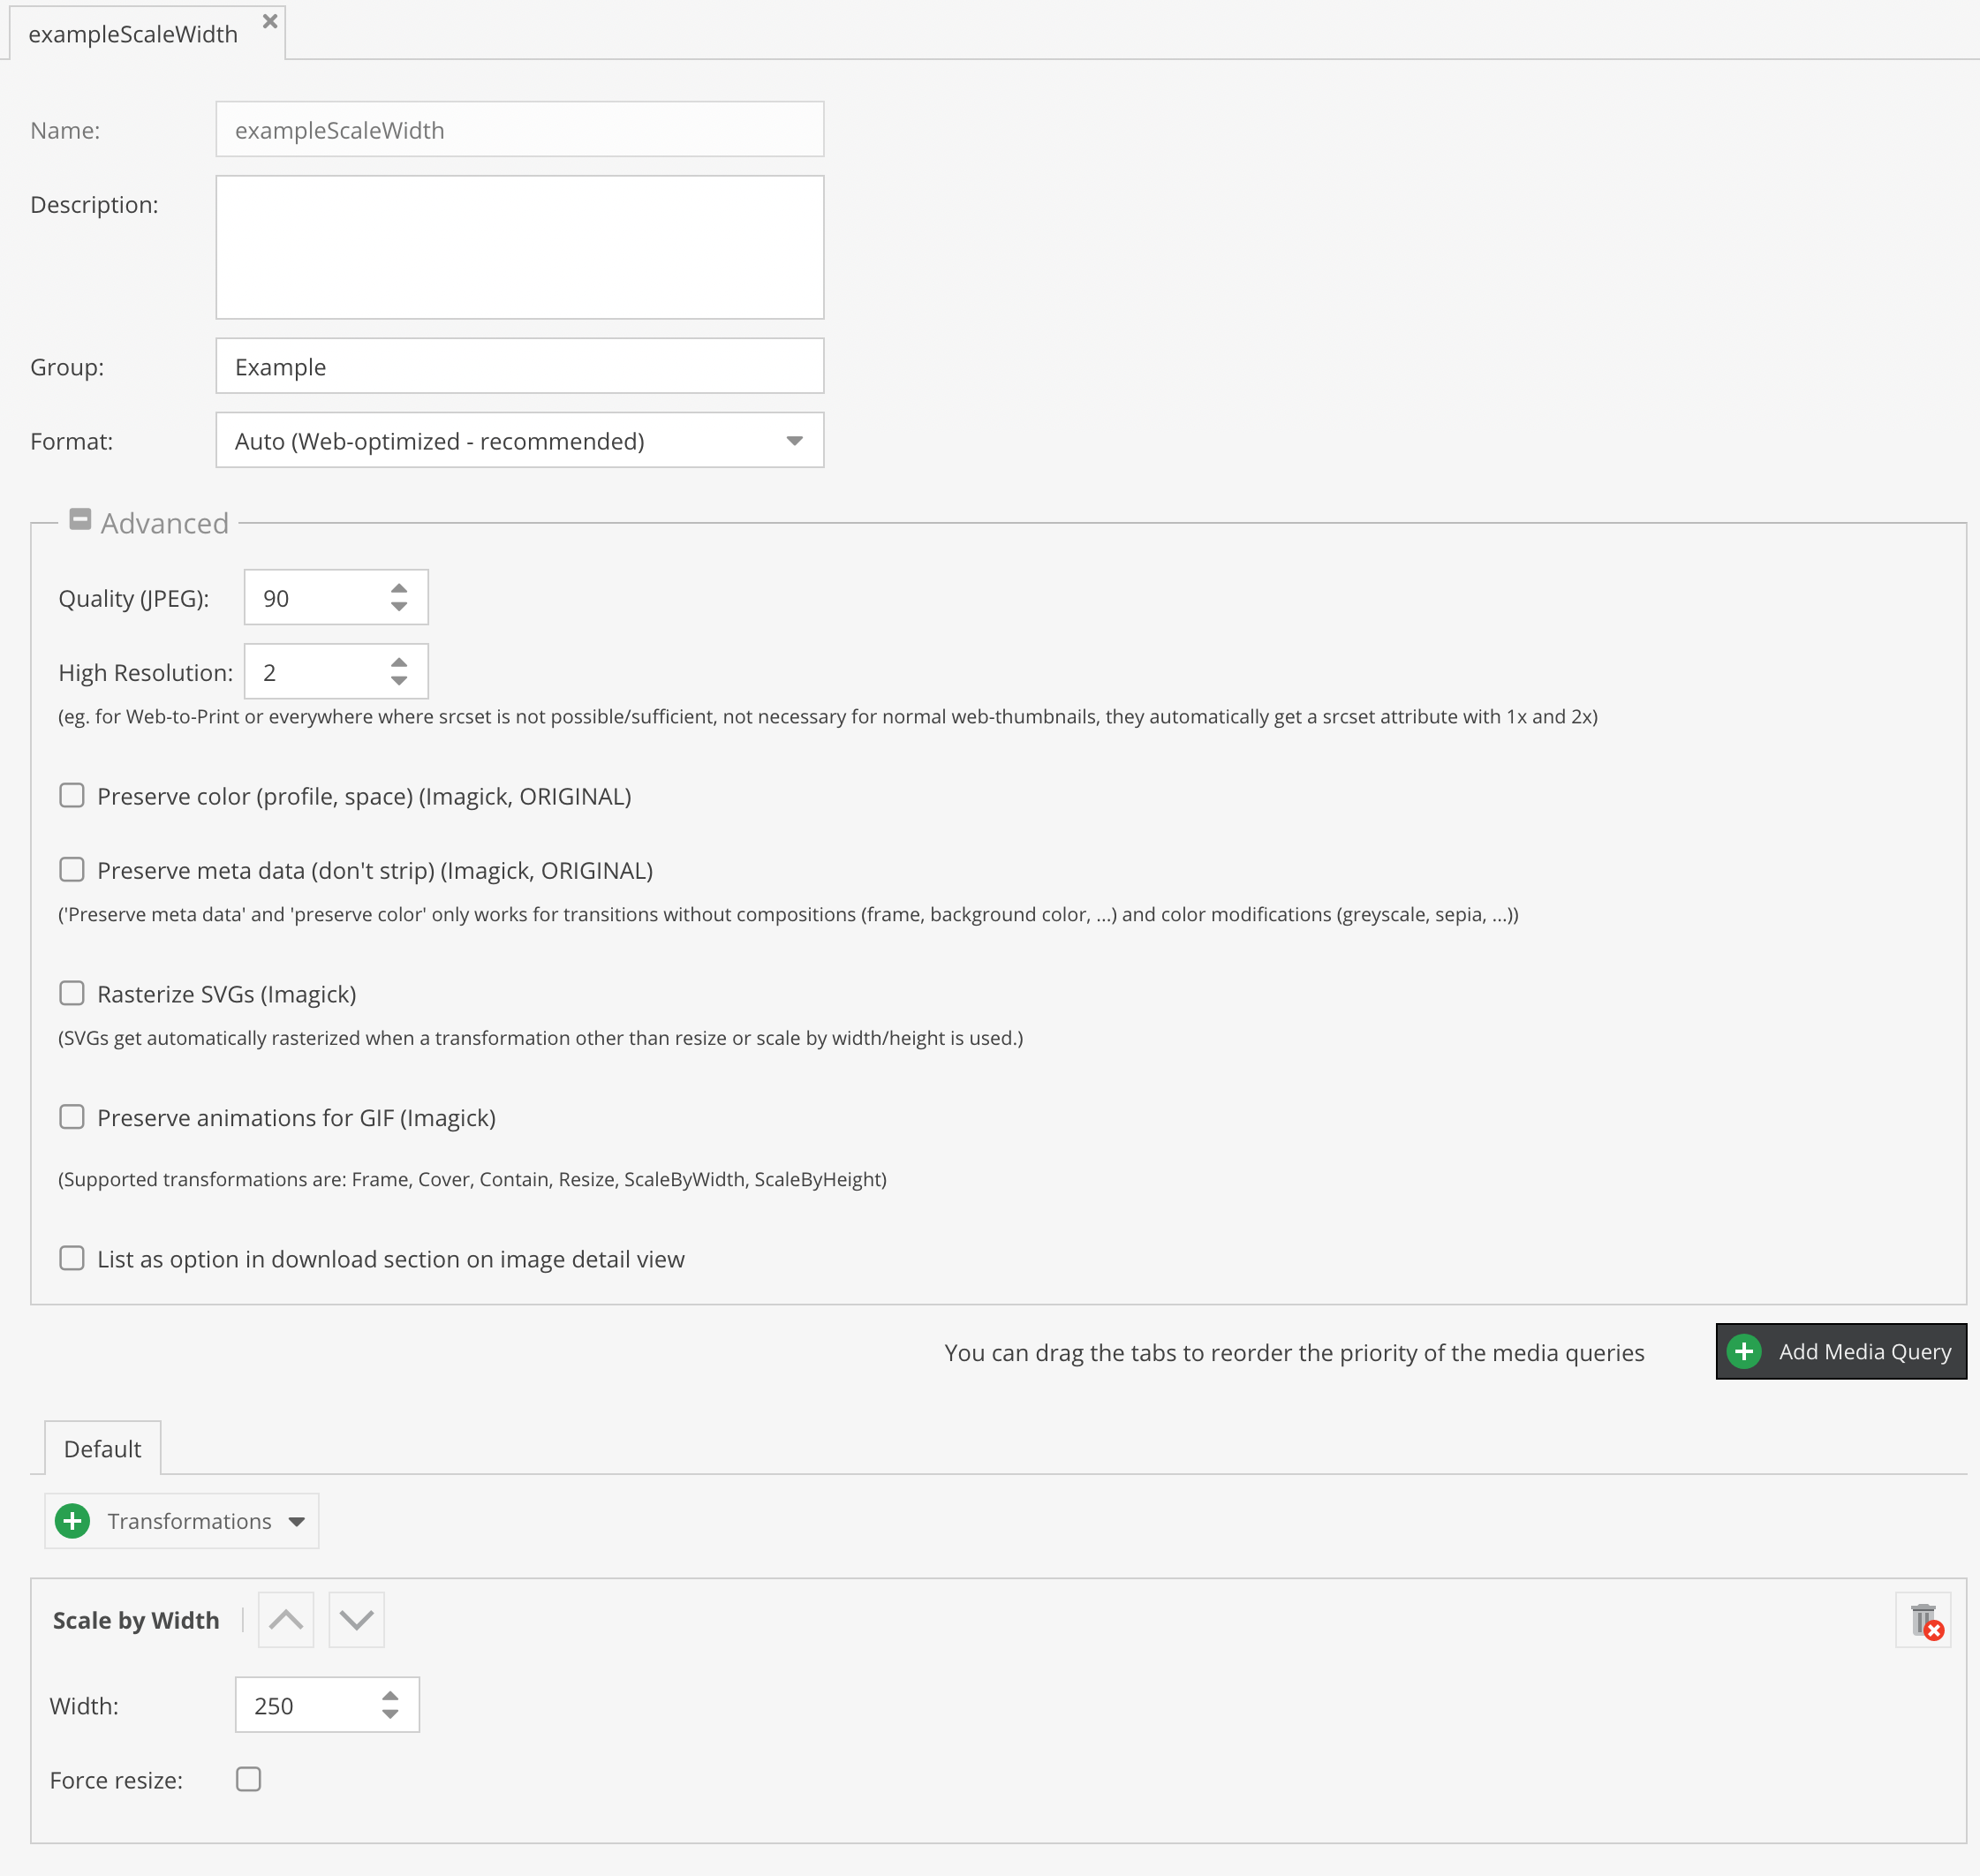

The above configuration generates a thumbnail with 500px width.
When using this configuration with the image editable:
{{ pimcore_image('myImage', {'thumbnail': 'contentimages'}) }}
this creates the following output:
<img src="/Car%20Images/ac%20cars/68/image-thumb__68__contentimages/automotive-car-classic-149813@2x.png" width="250" height="190" />
You can also add high-res dynamically:
{{ pimcore_image('myImage', {thumbnail: {
    width: 250,
    contain: true,
    highResolution: 2
}}) }}
This creates an image width = 500px.
Combining Dynamic Generation on Request with High-Resolution Images
This is especially useful when you want to serve thumbnails depending on the ppi of the device
screen or in combination with Web-to-Print documents (browser preview with normal size, tripled
in size for PDF output). Pimcore also uses this functionality internally to provide the
automatically added high-res support on <img> and <picture> tags.
This feature is only useful in some edge cases.
Example
{{ image.thumbnail('testThumbnailDefinitionName').path }}
This generates the following output:
/Car%20Images/ac%20cars/68/image-thumb__68__testThumbnailDefinitionName/automotive-car-classic-149813.jpg
To get a high-res version of the thumbnail, add @2x before the file extension:
/Car%20Images/ac%20cars/68/image-thumb__68__content/automotive-car-classic-149813@2x.png
/Car%20Images/ac%20cars/68/image-thumb__68__content/automotive-car-classic-149813@5x.png
Using float is possible too:
/Car%20Images/ac%20cars/68/image-thumb__68__content/automotive-car-classic-149813@3.2x.png
Pimcore then dynamically generates the thumbnails accordingly.
Media Queries in Thumbnail Configuration
When you use media queries in your thumbnail configuration, Pimcore automatically generates
a <picture> tag when calling $asset->getThumbnail("example")->getHtml().
In some cases it is necessary to get single thumbnails for certain media queries out of the
thumbnail object:
$a = Asset::getById(71);

// list all available medias in "galleryCarousel" thumbnail configuration
p_r(array_keys(Asset\Image\Thumbnail\Config::getByName("galleryCarousel")->getMedias()));

// get the <picture> element for "galleryCarousel" => default behavior
$a->getThumbnail("galleryCarousel")->getHtml();

// get path of thumbnail for media query min-width: 940px
$a->getThumbnail("galleryCarousel")->getMedia("(min-width: 940px)");

// get <img> tag for media query min-width: 320px including @srcset 2x
$a->getThumbnail("galleryCarousel")->getMedia("(min-width: 320px)")->getHtml();

// get 2x thumbnail path for media query min-width: 320px
$a->getThumbnail("galleryCarousel")->getMedia("(min-width: 320px)", 2);
Focal Point
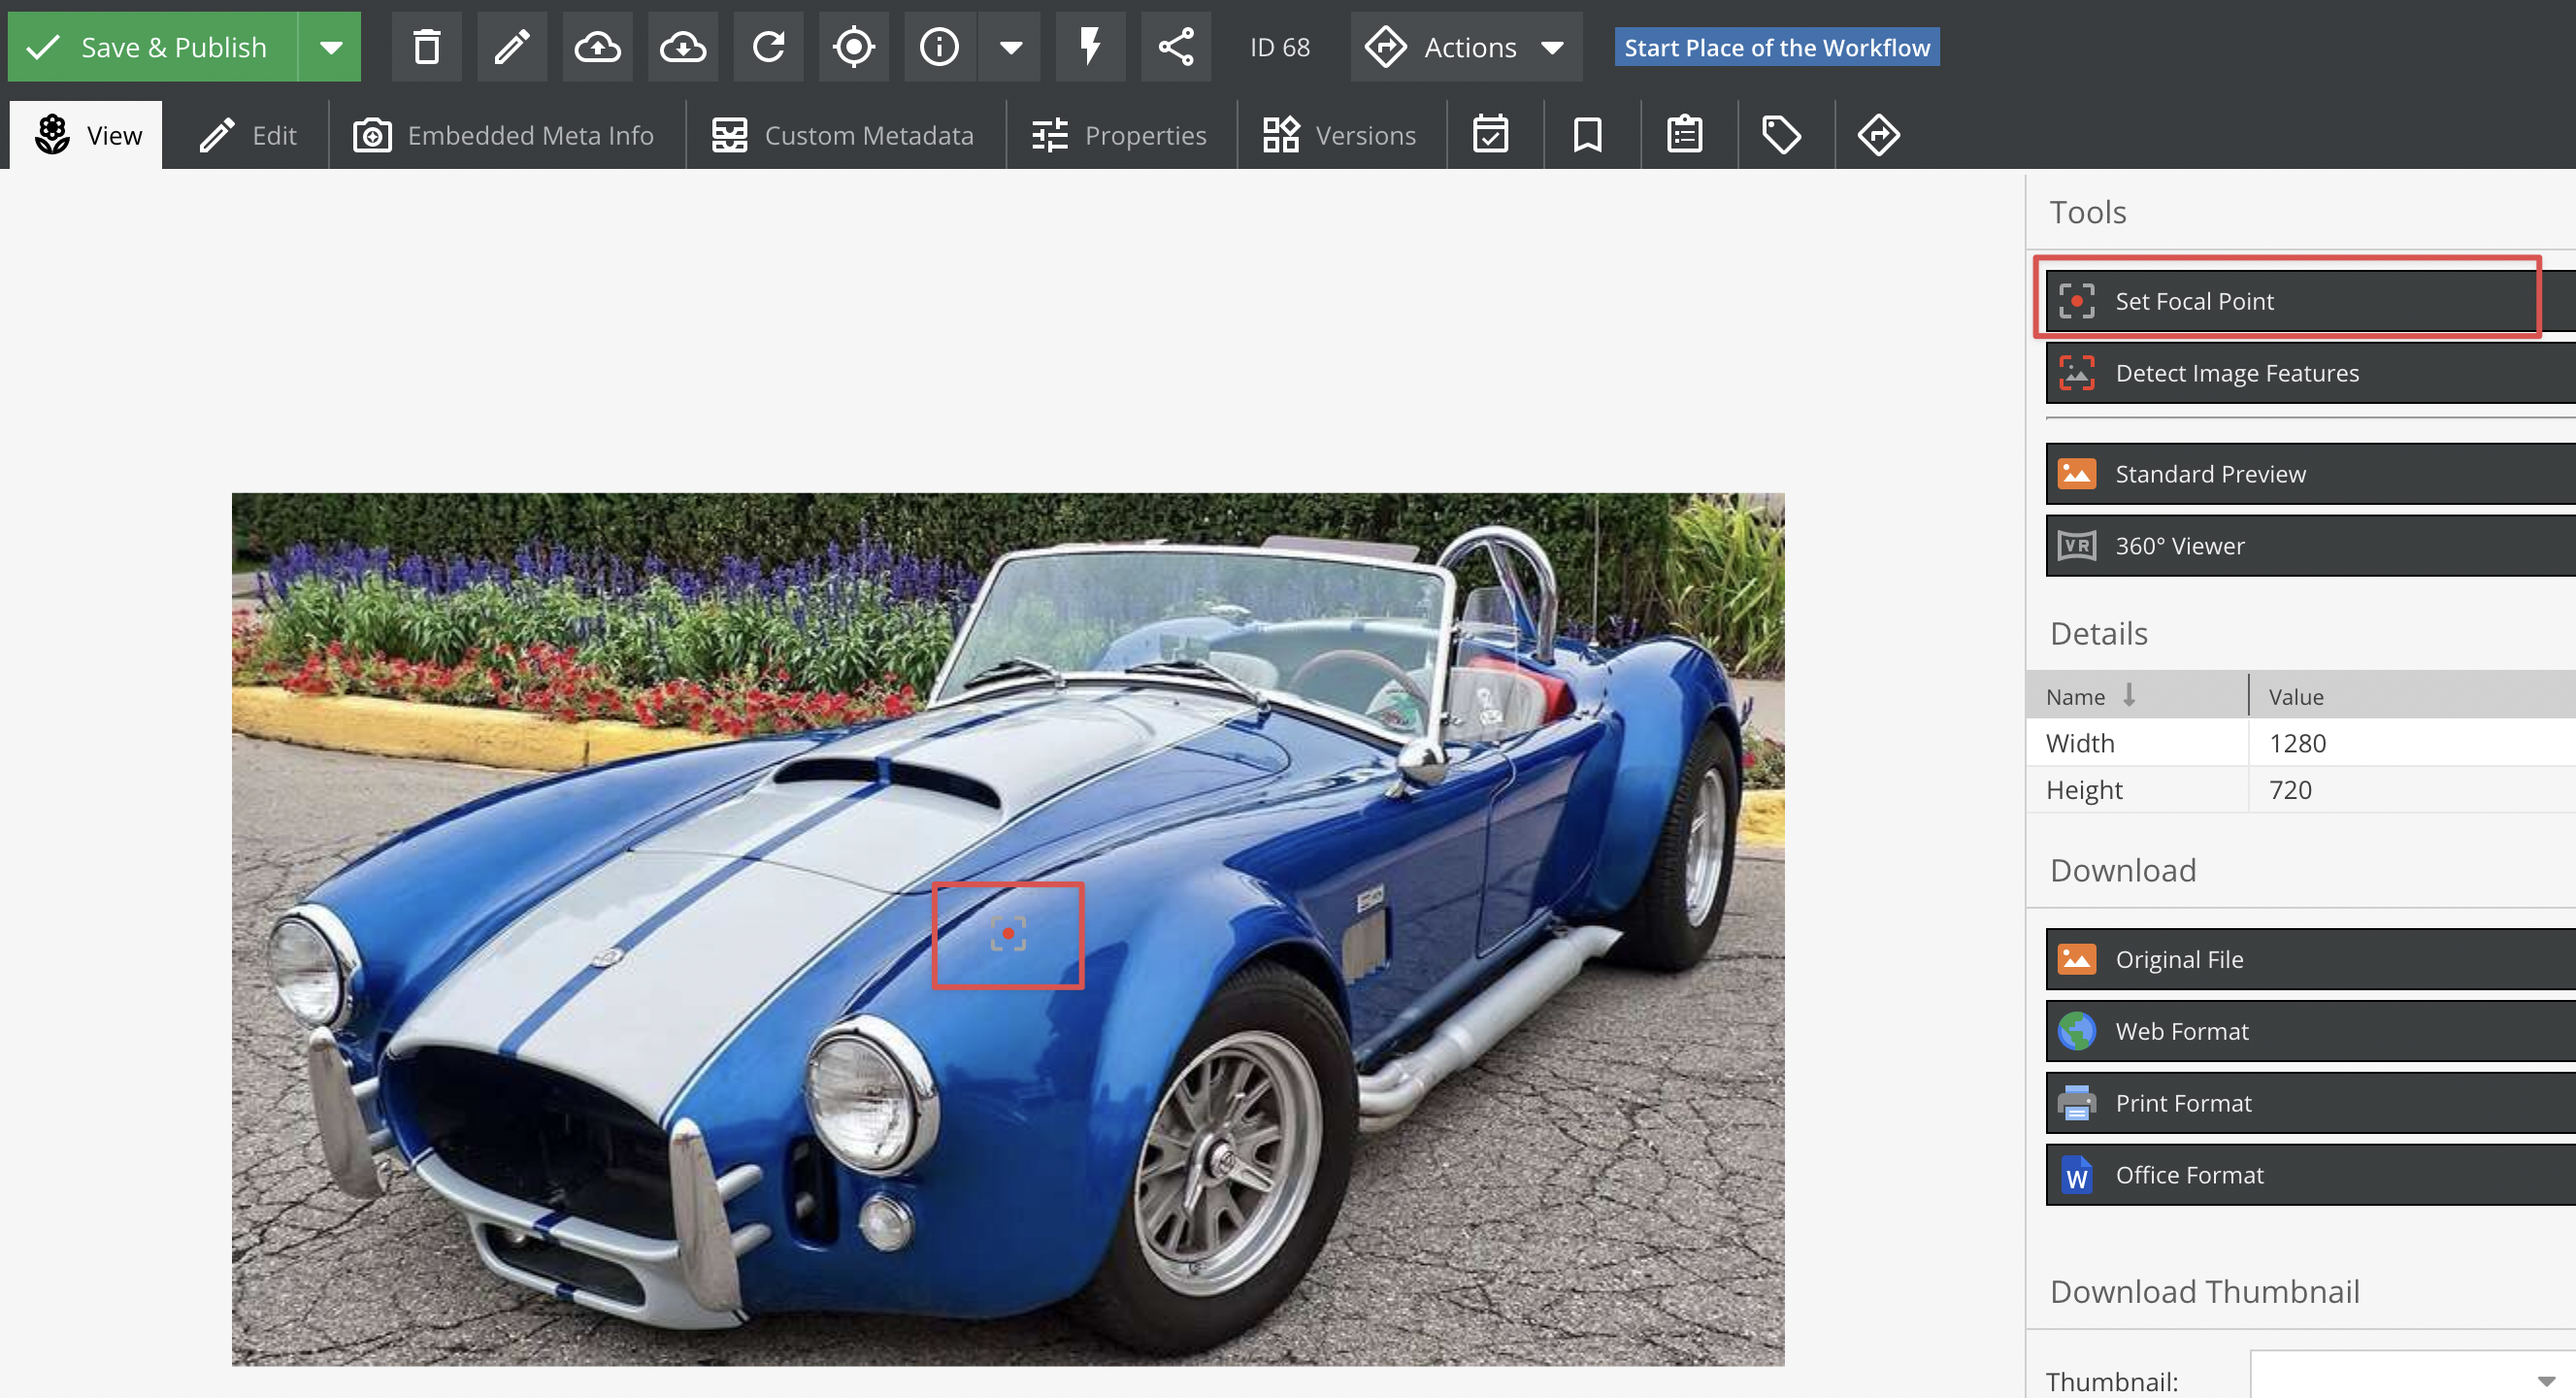
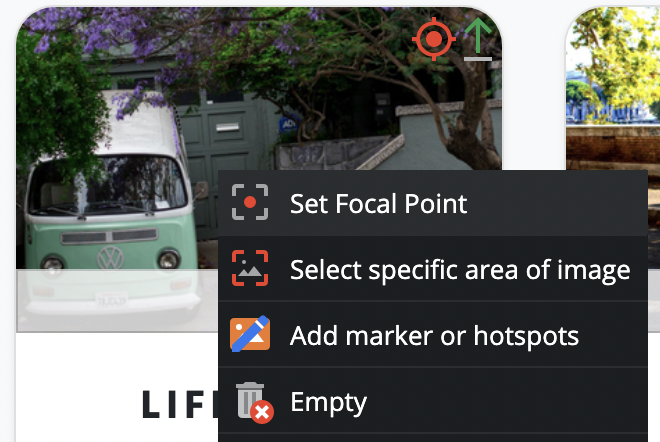
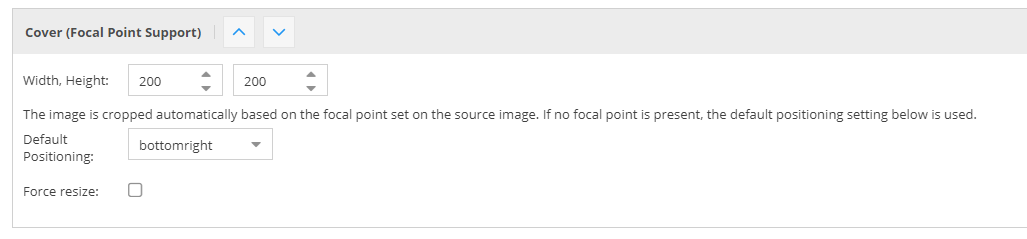
Pimcore supports focal points on images, which are considered when images are automatically
cropped. Currently this applies to the COVER transformation. If a focal point is set on
the source image, it is automatically considered and the thumbnail is cropped accordingly
to keep the focus on the focal point.



Clipping Support
Images with an embedded clipping path (8BIM / Adobe profile metadata) are automatically clipped when generating thumbnails.
To disable automatic clipping, add the following configuration:
pimcore:
    assets:
        image:
            thumbnails:
                clip_auto_support: false
Using ICC Color Profiles for CMYK to RGB
Pimcore supports ICC color profiles to get better results when converting CMYK images (without embedded color profile) to RGB.
Due to licensing, Pimcore does not include color profiles (*.icc files) in the download package. You can download them for free here: Adobe ICC Profiles or here: ICC (color.org).
After downloading the profiles, put them into your project folder or anywhere else on your server
(e.g. /usr/share/color/icc). Then configure the path:
pimcore:
    assets:
        # Absolute path to default ICC RGB profile (if no embedded profile is given)
        icc_rgb_profile: null

        # Absolute path to default ICC CMYK profile (if no embedded profile is given)
        icc_cmyk_profile: null
Customize Auto (Web-Optimized) Format
For most web-based applications, use the auto configuration, which does the following:
- Automatically selects the target image format (
jpeg,png) based on image characteristics (such as alpha channel) - Generates multiple additional optimized image formats (
webp,avif) using progressive enhancement (in<picture>tag) - Runs image optimizers (such as
jpegoptimandpngout) on generated images using an async queue
Even with the auto setting, you still need to set a quality in the thumbnail configuration.
This quality is used by jpeg and png and, if not configured otherwise, also for webp.
If avif is supported by Imagick, it uses a separate default quality value (50) instead of
the thumbnail configuration quality.
You can customize the alternative image formats and their qualities:
pimcore:
    assets:
        image:
            thumbnails:
                auto_formats:
                    # the quality is used by Imagick, set to null if quality value from config should be used
                    # the following config is used as the default by Pimcore
                    # the order of the formats is used for the priority of the <source> in the <picture> tag
                    avif:
                        quality: 50
                    webp:
                        quality: null
                        enabled: true
Disabling All Auto-Formats
pimcore:
    assets:
        image:
            thumbnails:
                auto_formats: null
Manually Specifying the Image Processing Adapter
You can manually specify the image processing adapter (Imagick or GD).
The default is auto-detected based on the availability of the imagick PECL extension.
You can also implement your own adapter by implementing Pimcore\Image\AdapterInterface.
To specify the adapter, use the following service configuration:
services:
    Pimcore\Image\AdapterInterface:
        alias: Pimcore\Image\Adapter\GD
        public: true
The adapter service needs to be public.
Note on Using WebP with Imagick Delegates
Ensure that your delegate definition for WebP encoding includes the -q flag, otherwise
the quality setting on thumbnails will not be considered and the default value of 75
is used by cwebp.
Working example of a WebP encode delegate (defined in /etc/ImageMagick-6/delegates.xml):
<delegate decode="png" encode="webp" command=""cwebp" -quiet -q %Q "%i" -o "%o""/>