Print Documents
Print documents are the way to create print-ready PDFs directly within Pimcore. They are based on the normal Pimcore documents and therefore support everything as pages do - starting from MVC pattern and template creation to document composing within Pimcore Studio with areas, drag&drop etc.
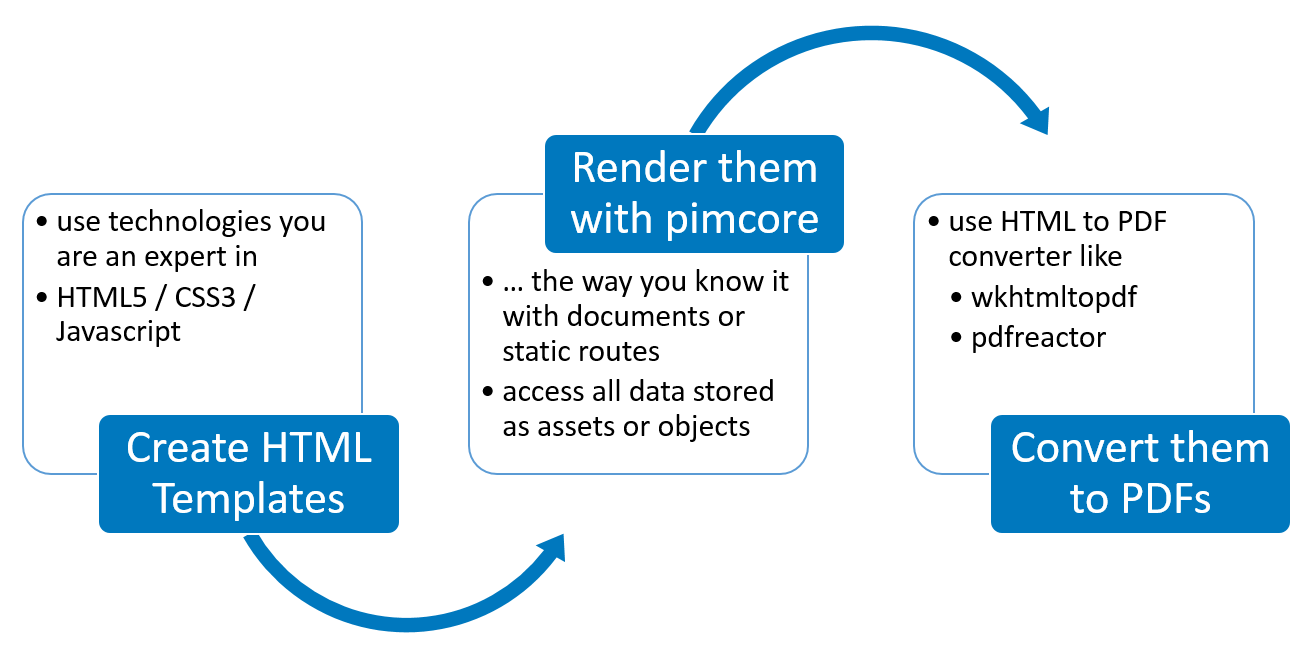
Web to print flow implemented in Pimcore:

Once activated, print documents are integrated into the default documents tree. To keep web documents and print documents in separate trees, set up custom views with widgets and the perspectives features.
Web-To-Print Document Types
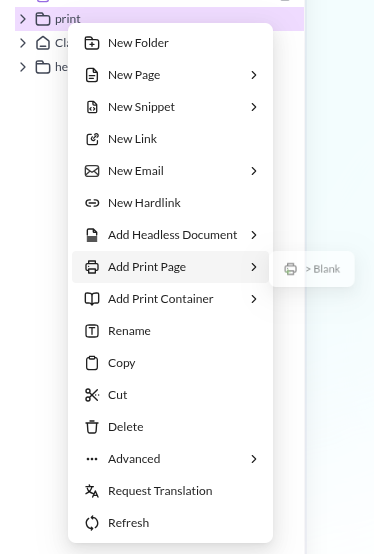
PrintPage
PrintPages are the documents that contain the actual content - with all the areas, editables, images, and so on. They are based on the normal Pimcore documents and content editing should be self-explanatory.

PrintContainer
PrintContainers are a special document type to represent containers of PrintPages. They do not have content of their own, they combine all sub pages into one single output PDF. This structures large print documents like catalogs, pricelists and books.
Of course, PrintContainers can be nested. So, one can use a root container, that contains several chapter containers that then contain the actual print pages.
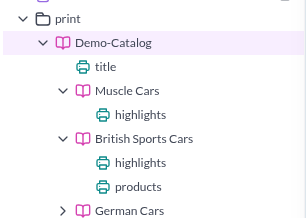

Even they don't have content for their own, PrintContainers are based on normal Pimcore documents.
Therefore, they also need a controller and a view. They have to make sure, that all sub pages are included into one single output view.
Pimcore ships with default implementations (Web2PrintController, containerAction) in skeleton and demo installation package.
PDF Rendering
Both web-to-print documents have an additional tab that is the place for rendering documents to print-ready PDFs. When rendering, the print is first rendered to HTML, then rendered as a Twig template (yes, you can use Twig expressions in the document) and then rendered to a PDF. PDF rendering itself is done by a third party renderer. Currently we support pdfreactor and Gotenberg. Please see their documentation for details concerning template possibilities.
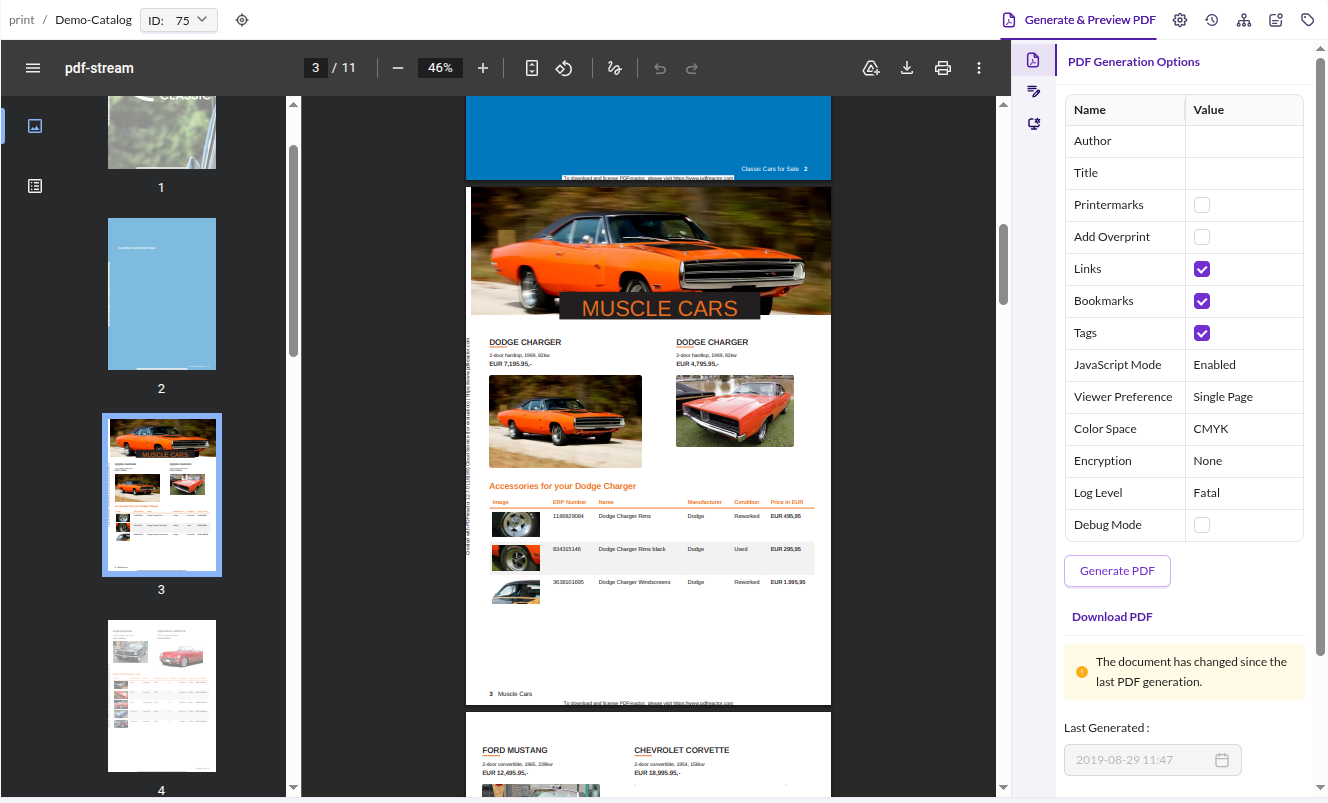

Depending on the renderer, additional settings may be available for the rendering process. The provided settings may be extended in the future. For details of settings please see section below or renderer documentation.
Sandbox Restrictions
Print document renders user controlled twig templates in a sandbox with restrictive security policies for tags, filters & functions. Please use following configuration to allow more in template rendering:
    pimcore:
          templating_engine:
              twig:
                sandbox_security_policy:
                  tags: ['if']
                  filters: ['upper']
                  functions: ['include', 'path']
Special PDFreactor Settings
Printermarks: PDFreactor can add printermarks to the PDF. Enable the printermarks rendering option in the
Generate & Preview PDF tab. Printermarks are driven by PDFreactor's proprietary @page CSS properties, so the bundle
only sets the option, your print template supplies the CSS.
The bundle no longer ships a printermarks stylesheet. public/css/print/print-printermarks.css was removed in
2026.1.0 together with the Admin Classic assets, see the Upgrade notes. Add the
rules to your own print stylesheet instead. The previously shipped file was:
@page {
    -ro-media-size: SRA4 portrait;
    -ro-bleed-width: 5mm;

    -ro-marks: bleed trim registration;

    -ro-colorbar-top-left: gradient-tint;
    -ro-colorbar-top-right: progressive-color;

    -ro-colorbar-bottom-left: cmyk(100%, 0%, 0%, 0%) cmyk(75%, 0%, 0%, 0%) cmyk(50%, 0%, 0%, 0%) cmyk(25%, 0%, 0%, 0%)
    cmyk(0%, 100%, 0%, 0%) cmyk(0%, 75%, 0%, 0%) cmyk(0%, 50%, 0%, 0%) cmyk(0%, 25%, 0%, 0%);

    -ro-colorbar-bottom-right: cmyk(0%, 0%, 25%, 0%) cmyk(0%, 0%, 50%, 0%) cmyk(0%, 0%, 75%, 0%) cmyk(0%, 0%, 100%, 0%)
    cmyk(0%, 0%, 0%, 25%) cmyk(0%, 0%, 0%, 50%) cmyk(0%, 0%, 0%, 75%) cmyk(0%, 0%, 0%, 100%);
}
Include the stylesheet from your print layout only when the option is active, as shown in the demo print catalog layout.
Settings
In the web-to-print settings, the used PDF renderer is specified. Depending on the renderer, there are additional settings to be made. Additional explanation can be found directly in the settings form. These settings have to be set properly before starting PDF rendering.
Relevant Log Files
If PDF rendering doesn't work properly, following log files should give you a hit for the reason.
var/log/dev.logorvar/log/prod.log- contains general logging information for rendering process at INFO levelvar/log/web2print-output.log- contains output of rendering PHP process (if any). It is recreated on every rendering process.
Color management and images
If you are using the PDFReactor renderer, use CMYK CSS color specifications (see PDFReactor documentation on details).
There are two possible workflows for images:
-
Use print-ready source images (for example TIFF files with the correct ICC Profiles) in your documents with "Print (...)" thumbnail format setting. This keeps the colorspace correct when used for print rendering and converts to RGB for preview and edit-mode.
-
Keep RGB style PNG/Jpeg images in the CMYK PDF files and let the printing house take care of converting them to the correct colorspace.
Option 2) is preferred, as colorspace conversions are tricky and error-prone due to tightly coupled printer hardware dependencies.