Documents
Documents are CMS pages in Pimcore. Each document is backed by a Symfony controller and a Twig template, and can contain editable regions that content editors fill through Pimcore Studio. In this tutorial, you will create a content page, then build a product page that displays data from the object you created earlier.
Create a Controller
Create a file called ContentController.php in the /src/Controller directory:
<?php

namespace App\Controller;

use Pimcore\Controller\FrontendController;
use Symfony\Bridge\Twig\Attribute\Template;
use Symfony\Component\HttpFoundation\Request;

class ContentController extends FrontendController
{
    #[Template('content/default.html.twig')]
    public function defaultAction(Request $request): array
    {
        return [];
    }
}
The defaultAction renders the template content/default.html.twig.
For now, the action is empty since the template handles the editable content.
Create a Template
Create the file /templates/content/default.html.twig:
{% extends 'layout.html.twig' %}

{% block content %}
    <h1>{{ pimcore_input("headline", {"width": 540}) }}</h1>

    {% for i in pimcore_iterate_block(pimcore_block('contentblock')) %}
        <h2>{{ pimcore_input('subline') }}</h2>
        {{ pimcore_wysiwyg('content') }}
    {% endfor %}
{% endblock %}
Pimcore uses the Symfony Twig engine and adds its own editables - placeholders like pimcore_input,
pimcore_block, and pimcore_wysiwyg that become editable fields in Pimcore Studio.
For the full list, see the Editables documentation in the Documents reference.
Add a Layout
Create the file /templates/layout.html.twig. This layout wraps all pages and provides the HTML skeleton:
<!DOCTYPE html>
<html lang="en">
<head>
    <meta charset="UTF-8">
    <title>Example</title>
    <style>
        body {
            padding: 0;
            margin: 0;
            font-family: "Lucida Sans Unicode", Arial;
            font-size: 14px;
        }

        #site {
            margin: 0 auto;
            width: 600px;
            padding: 30px 0 0 0;
            color: #65615E;
        }

        h1, h2, h3 {
            font-size: 18px;
            padding: 0 0 5px 0;
            border-bottom: 1px solid #001428;
            margin-bottom: 5px;
        }

        h3 {
            font-size: 14px;
            padding: 15px 0 5px 0;
            margin-bottom: 5px;
            border-color: #cccccc;
        }

        img {
            border: 0;
        }

        p {
            padding: 0 0 5px 0;
        }

        a {
            color: #000;
        }

        #logo {
            text-align: center;
            padding: 50px 0;
        }

        #logo hr {
            display: block;
            height: 1px;
            overflow: hidden;
            background: #BBB;
            border: 0;
            padding: 0;
            margin: 30px 0 20px 0;
        }

        .claim {
            text-transform: uppercase;
            color: #BBB;
        }

        #site ul {
            padding: 10px 0 10px 20px;
            list-style: circle;
        }

        .buttons {
            margin-bottom: 100px;
            text-align: center;
        }

        .buttons a {
            display: inline-block;
            background: #6428b4;
            color: #fff;
            padding: 5px 10px;
            margin-right: 10px;
            width: 40%;
            border-radius: 2px;
            text-decoration: none;
        }

        .buttons a:hover {
            background: #1C8BC1;
        }

        .buttons a:last-child {
            margin: 0;
        }

    </style>
</head>
<body>
    <div id="site">
        <div id="logo">
            <a href="http://www.pimcore.com/"><img src="/bundles/pimcoreadmin/img/logo-claim-gray.svg"
                                                   style="width: 400px;"/></a>
            <hr/>
        </div>
        {{ block('content') }}
    </div>
</body>
</html>
The {{ block('content') }} placeholder is where each page's content is inserted.
Connect Controller to a Document
Now connect the controller action to a page in Pimcore Studio so the page knows which action (and template) to use.
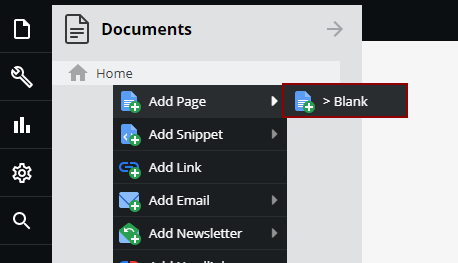
- In the Documents panel, right-click on Home and select Add Page > Empty Page.

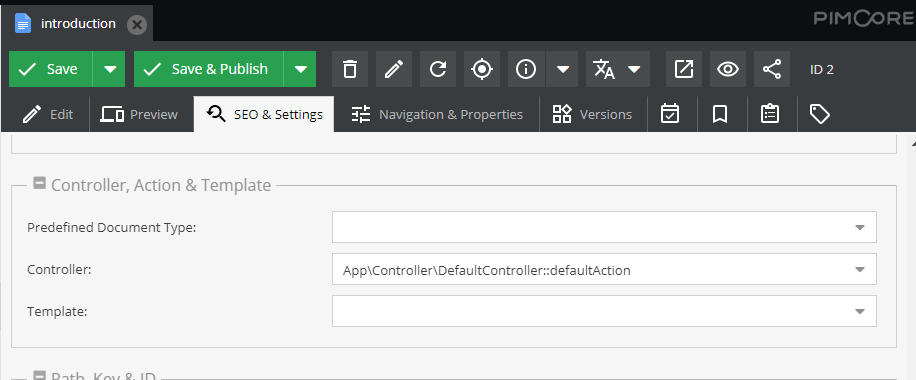
- Open the Settings tab and select the controller and action.

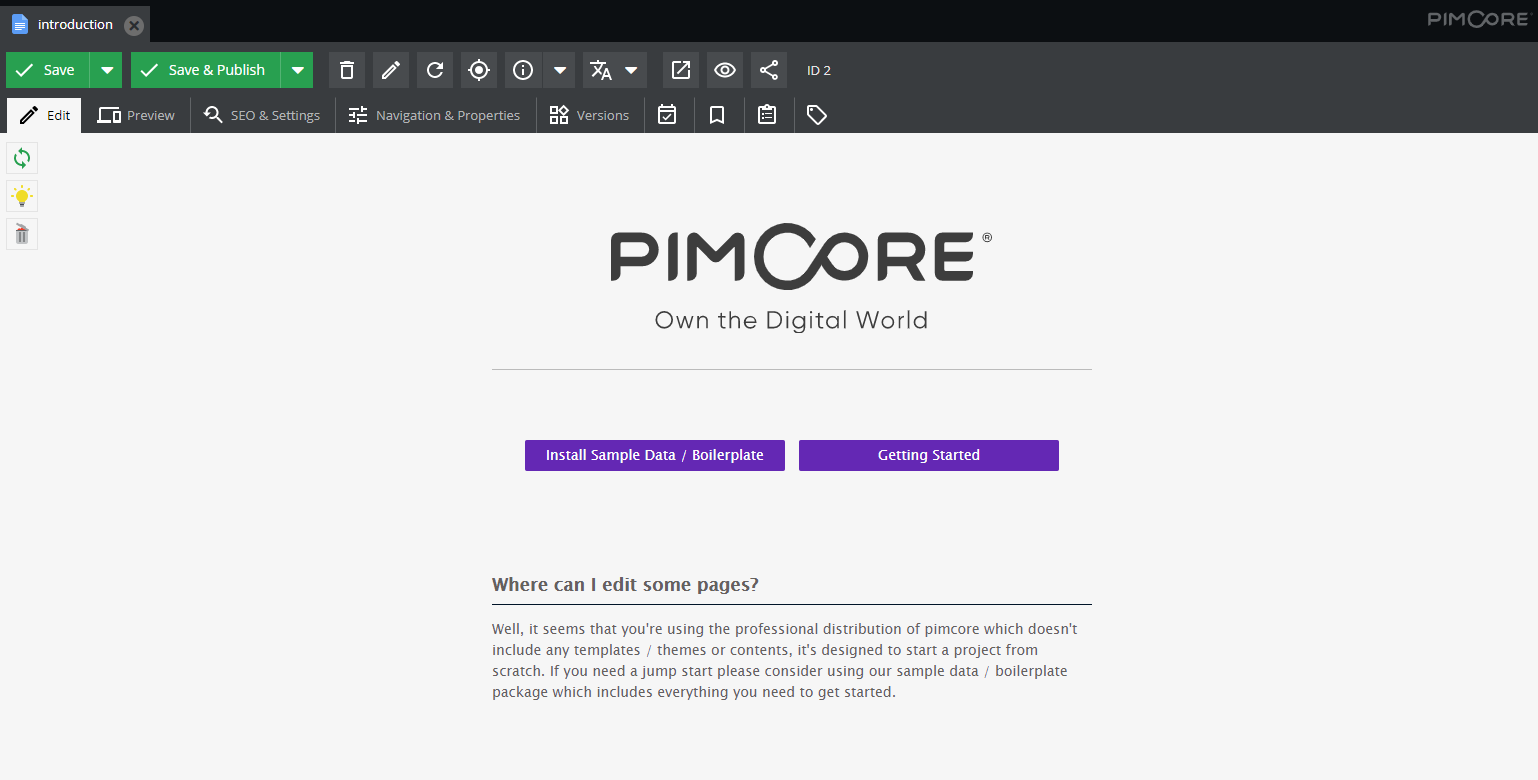
- Save the document (Save & Publish), then switch to the Edit tab to see the editable placeholders.

Create a Product Page
Now connect a data object to a document to display product information.
Add a Product Action
Update /src/Controller/ContentController.php to include the new productAction method:
<?php

namespace App\Controller;

use Pimcore\Controller\FrontendController;
use Symfony\Bridge\Twig\Attribute\Template;
use Symfony\Component\HttpFoundation\Request;
use Symfony\Component\HttpFoundation\Response;

class ContentController extends FrontendController
{
    #[Template('content/default.html.twig')]
    public function defaultAction(Request $request): array
    {
        return [];
    }

    public function productAction(Request $request): Response
    {
        return $this->render('content/product.html.twig');
    }
}
Create the Product Template
Create the file /templates/content/product.html.twig:
{% extends 'layout.html.twig' %}

{% block content %}
    <h1>{{ pimcore_input("headline", {"width": 540}) }}</h1>

    <div class="product-info">
        {% if editmode %}
            {{ pimcore_relation("product") }}
        {% else %}
            {% set product = pimcore_relation("product").element %}
            {% if product %}
                <h2>{{ product.name }}</h2>
                <div class="content">
                    {% if product.picture %}
                        {{ product.picture.thumbnail("content").html|raw }}
                    {% endif %}

                    {{ product.description|raw }}
                </div>
            {% endif %}
        {% endif %}
    </div>
{% endblock %}
Key concepts in this template:
editmodeis a built-in variable that istruewhen the page is being edited in Pimcore Studio. This lets you show different content in edit mode vs. the frontend.pimcore_relation("product")creates an editable placeholder for a 1-to-1 relation. In edit mode, it renders a drop zone where you can drag a data object. In frontend mode,.elementgives you access to the linked object and all its attributes.product.picture.thumbnail("content").htmlrenders an<img>tag using the "content" thumbnail configuration (see below). The tag includes the correct image path and alt attributes based on asset metadata.
Configure a Thumbnail
To display the product image, you need a thumbnail configuration. Thumbnail configurations let Pimcore automatically render optimized images for different output channels, including high-resolution @2x versions.
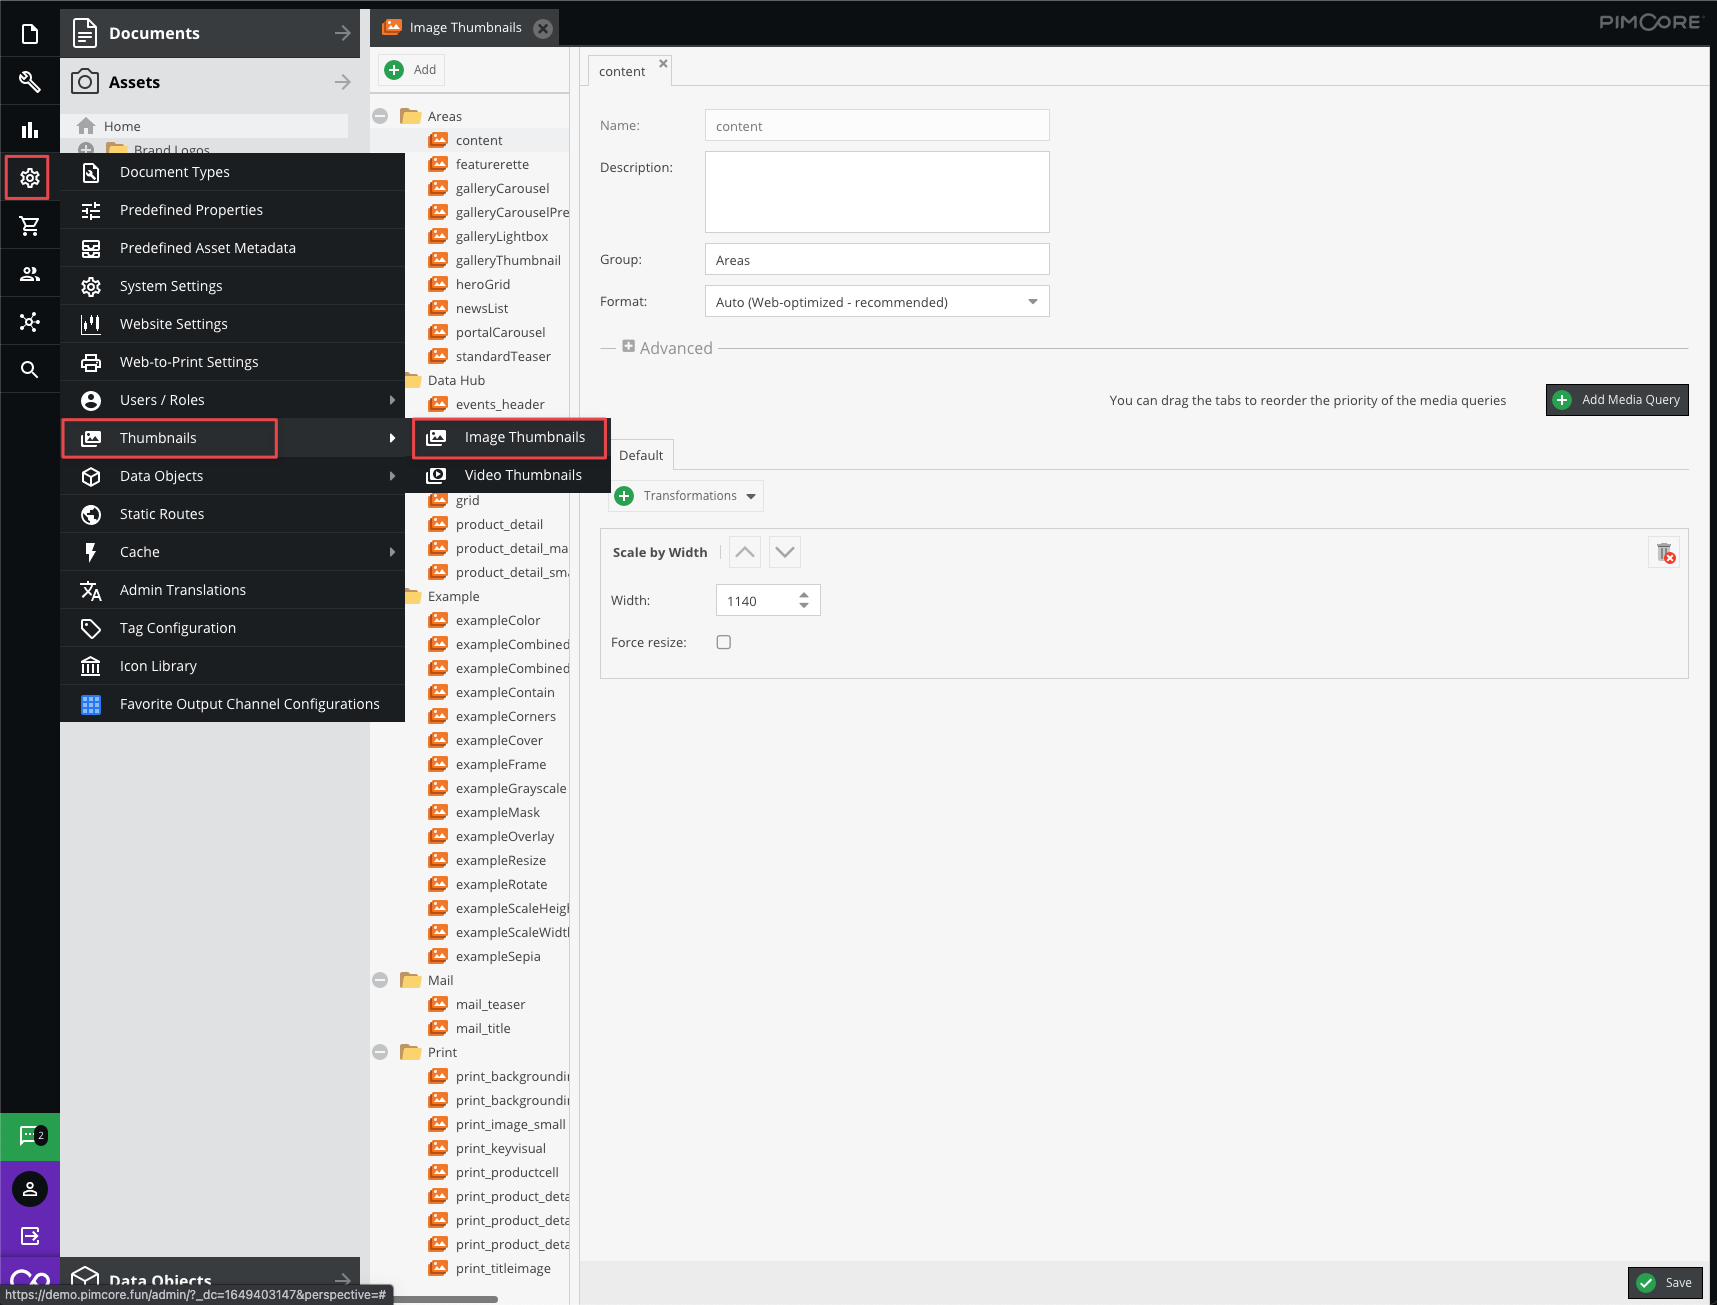
In Pimcore Studio, navigate to Settings > Assets > Thumbnails > Image Thumbnails and create a new thumbnail configuration named content. Set the width to 600 pixels and leave other fields at their defaults.

Link the Product Object to a Document
- In the Documents panel, right-click on Home, then select Add Page > Empty Page.
- Set the document key to tshirt if you want the page to be reachable at
http://localhost/tshirt. If you choose a different key, use that path instead. - In the Settings tab, choose the
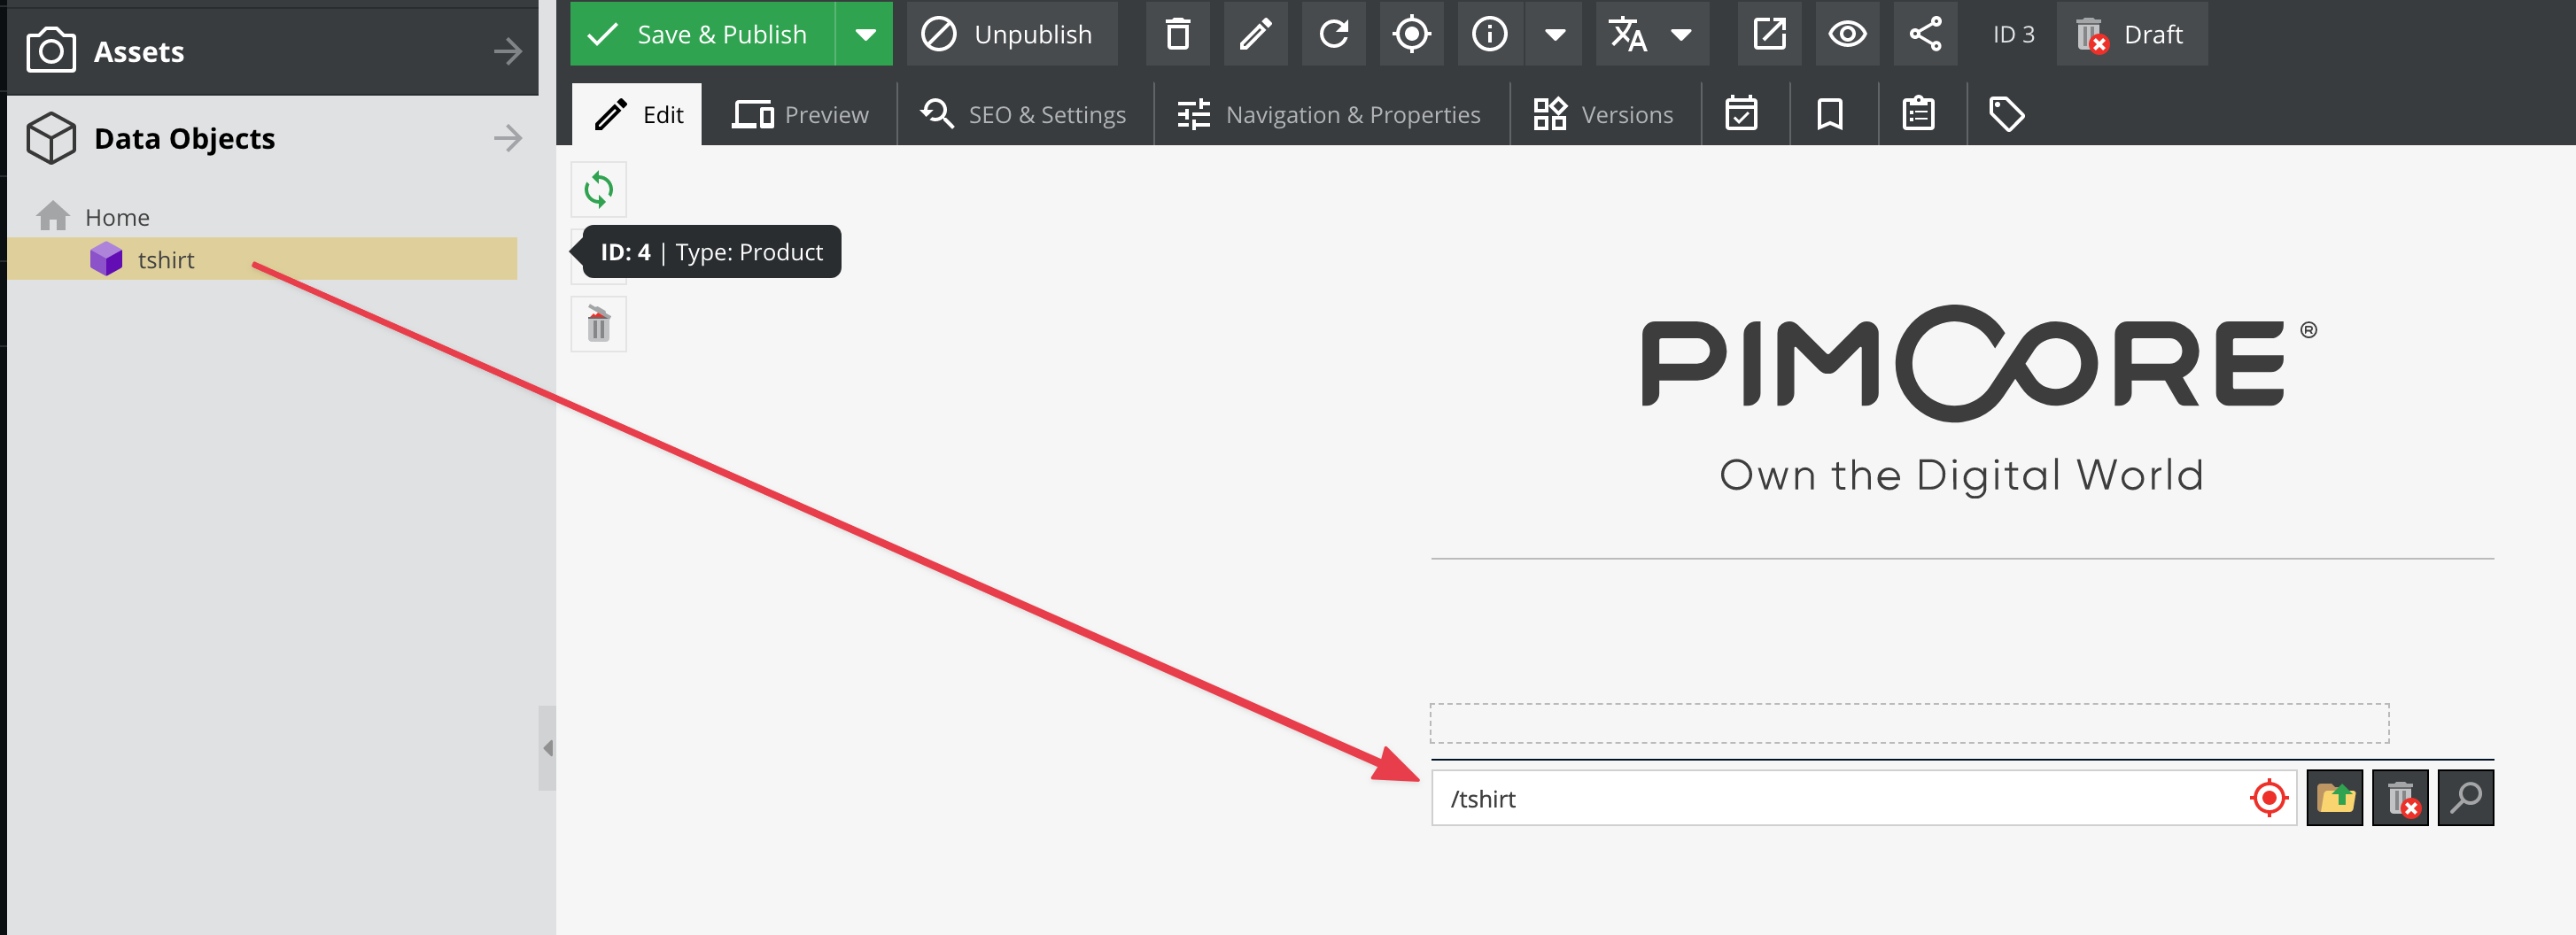
Contentcontroller and theproductaction. Click Save. - In the Edit tab, drag the product object from the Objects panel onto the relation placeholder.
- Click Save & Publish.

View the Result
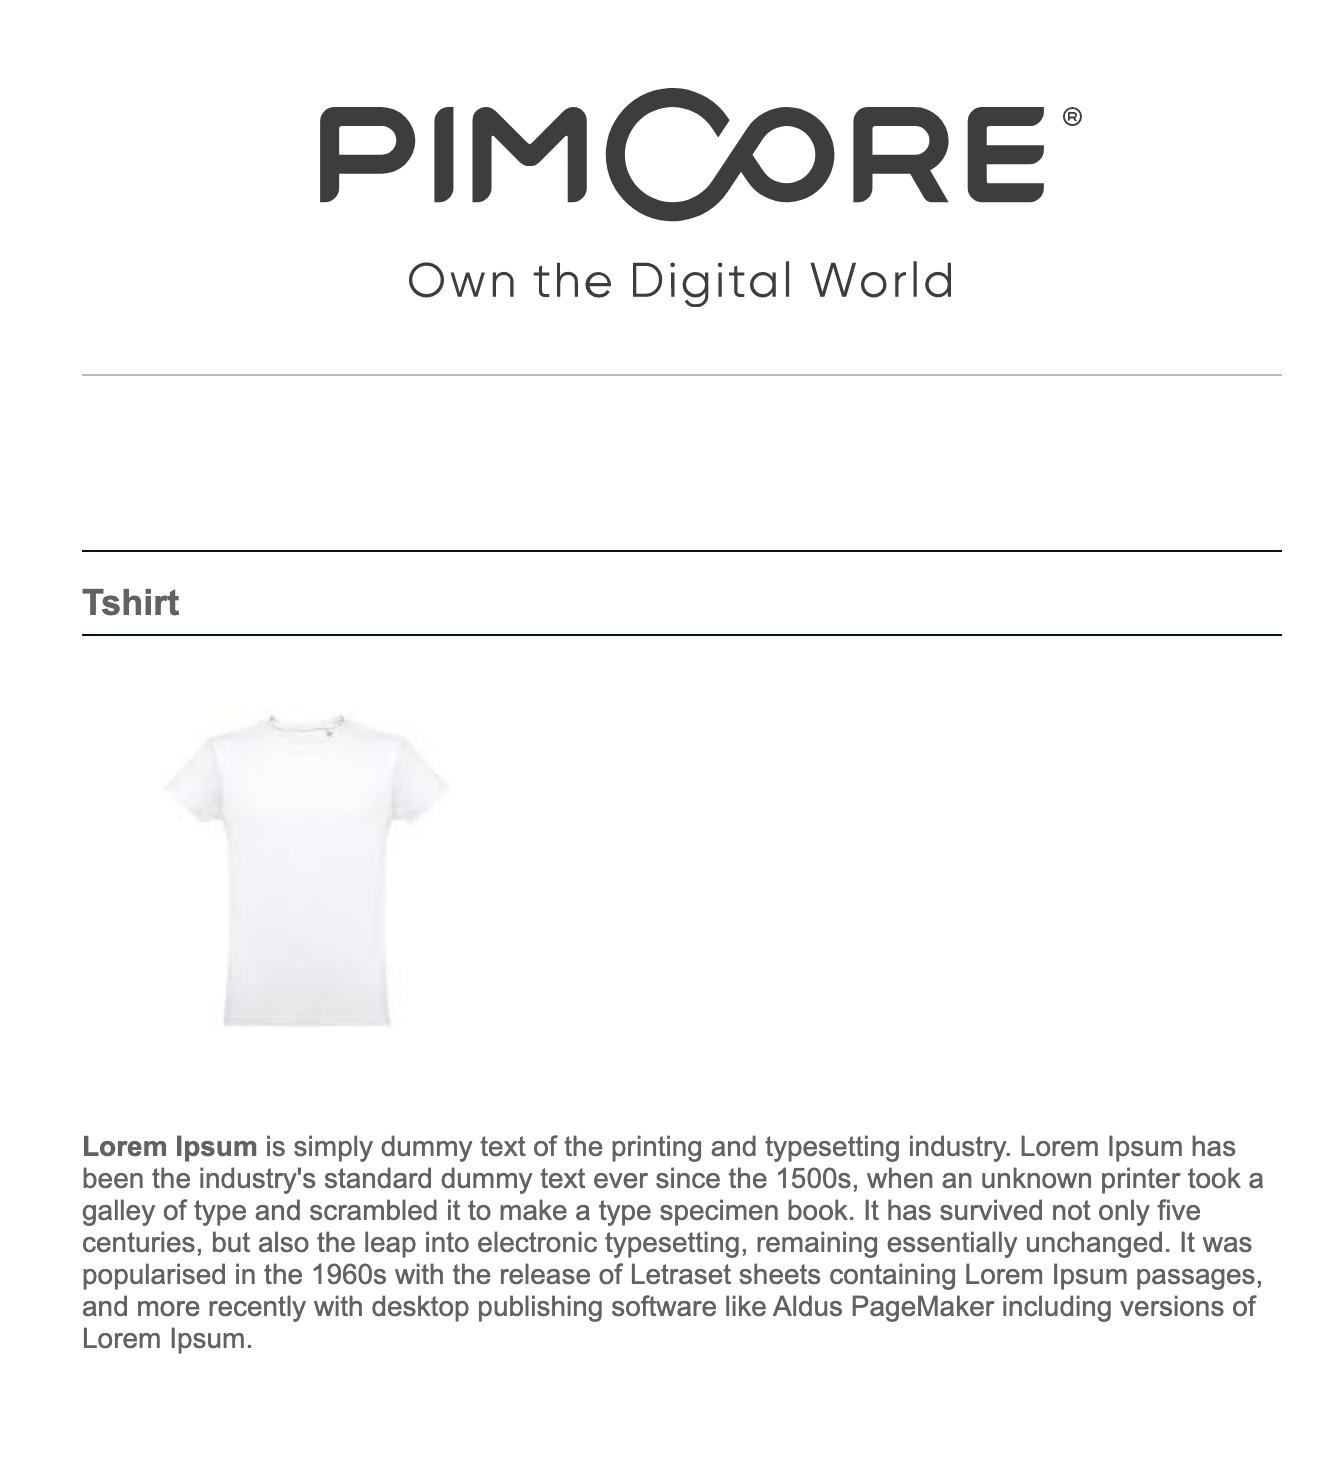
Open the product page in your browser (e.g. http://localhost/tshirt where tshirt is the document name).
The page displays the product name, description, and image using data from the linked object:

Next Steps
Once you are comfortable with the basics covered in this tutorial, explore the detailed reference documentation for each element type in the Pimcore Core section: Documents (page types, editables, properties), Objects (class definitions, data types, inheritance), and Assets (thumbnails, metadata, versioning).